Calendar in Microsoft Dynamics AX 2012 R3
- Supreme Consultant

- Feb 10, 2019
- 2 min read
The Calendars in the Microsoft Dynamics AX is the most crucial setup which is more important in creating and maintaining transactions such as Time sheet, Production Order, Routing configuration for production etc.,
Create Working Time Template:
The first step in setting up working time calendars is to create a working time template. Use the template to define the hours of operation, or the work periods for each day of the week.
Path: Organization administration >> Common >> Calendars >> Working time templates.

1. Click New to create a new line.

2. On the Overview tab, in the Working time template field, enter an alphanumeric identifier of up to 10 characters.
3. In the Name field, enter a descriptive name for the template.

4. Select the tab that corresponds to the day of the week that you want to define working hours for, and click Add to create a new line. (Repeat this Step for all the required days).
5. In the From field, enter the starting time for the day or the period. (Repeat this Step for all the required days).
6. In the To field, enter the ending time for the day or the period. This can be defined as a day, a shift, or a temporary stop in operation, such as a lunch period. (Repeat this Step for all the required days).
7. In the Efficiency field, enter the efficiency percentage. (Repeat this Step for all the required days).
8. In the Property field, select the property for the selected day's working time template. (Repeat this Step for all the required days).

9. Close the form to save the working time templates and map it with the calendar while composing working times.
Create Calendar and Compose Working Times:
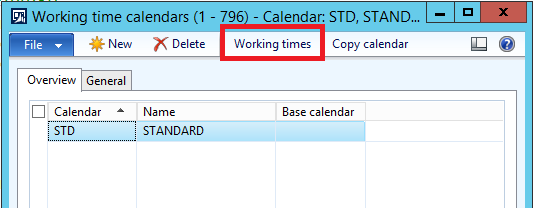
Path: Organization administration >> Common >> Calendars >> Calendars.

1. On the toolbar, click New to create a new line.

2. In the Calendar field, enter a unique identifier of up to ten characters.
3. In the Name field, enter a descriptive name.
4. Optional: In the Base calendar field, select the base calendar that the new calendar is based on.
5. Click Working times to open a working times form.

6. Click Compose working times to create or update working times for the calendar.

7. In the Calendar field, select the name of the calendar to compose working times for.
8. In the From date field, enter the first date to compose working times for. By default, the field contains the current date.
9. In the To date field, enter the last date to compose working times for. By default, the field contains a date that is one year from the current date.
10. If you want to create the calendar from a base calendar, select the Use base calendar check box.
11. In the Working time template field, select the appropriate template.
12. Click OK.


Comments